Windows virtual IoT
To start using the Windows virtual IoT:
Make sure all prerequisites are met.
Install the Windows virtual IoT on a Windows computer.
Configure the Windows Firewall.
Connect your devices to the Windows virtual IoT.
Khoá học tiên quyết
The following prerequisites must be met before setting up and using the Windows virtual IoT:
A valid IoT box subscription.
An updated and recent version of Windows (i.e., Windows 10 or Windows 11) installed on a Windows computer (laptop, desktop, or server).
Ghi chú
MRP devices, including cameras and measurement tools, are not compatible with Windows virtual IoT.
It is also possible to create a Windows Virtual Machine on a MacOS/Linux computer. However, this option is not supported by Odoo, and no troubleshooting assistance will be provided.
Lắp đặt
To install the Windows virtual IoT on a Windows computer:
Access Odoo’s download page and download the Odoo installation package for Windows matching your database’s version.
Open the downloaded
.exefile, allow the app to make changes to your device, select a language, and click OK.Click Next, then I Agree to accept the terms and conditions and continue.
Select Odoo IoT from the Select the type of install dropdown list. The following components should be selected: Odoo Server, Odoo IoT, Nginx WebServer, and Ghostscript interpreter.
Verify you have the required space on your computer and click Next.
In the Destination folder, enter C:\odoo and click Install.
Cảnh báo
Do not install Odoo’s Windows virtual IoT in any Windows user directory, as this can cause issues with iot/https_certificate_iot/generation.
Once the installation is complete, click Next.
Set up GPL Ghostscript: Click Next, agree to the terms and conditions, click Install, then Finish.
Click Next, Next, and Finish to complete the setup. The IoT system's homepage automatically opens in a web browser with the URL
http://localhost:8069.Mẹo
If the web browser does not show anything, restart the Windows virtual IoT service.
Check that you can access the IoT system's homepage in a web browser:
on the Windows virtual IoT computer, and
on another device on the same network as the IoT system by navigating to the URL
http://xxx:8069(wherexxxis the IoT system’s IP address).on another device on the same network as the IoT system by navigating to the URL
https://xxx(wherexxxis the IoT system’s IP address) to test for HTTPS connection.Mẹo
If you cannot access the IoT system's homepage from another device, create a Windows Firewall rule to allow communication through port
8069.
Windows Firewall configuration
Firewalls help keep devices secure but can sometimes block legitimate connections. If the Windows virtual IoT isn’t accessible on the LAN, for example from another device, it could be due to a firewall blocking the connection. To prevent this issue, configure exceptions for network discovery in the OS or firewall settings.
Ghi chú
If third-party firewall software is installed on the Windows computer, refer to the software’s documentation to configure firewall exceptions.
To create a rule on Windows Defender and allow communication through port 8069, follow these
steps:
Search the Windows start menu for
firewalland select the Windows Defender Firewall with Advanced Security app.In the left part of the window, select Inbound Rules.
In the right part of the window, under Actions, click New Rule.
In the New Inbound Rule Wizard that opens, select the Port type of rule and click Next.
On the Protocols and Ports page, make sure TCP and Specified local ports are selected, enter the following in the field:
8069, 80, 443, and click Next.Ghi chú
Other ports may be necessary depending on your IoT devices. For example, for the Worldline payment terminal, add the
9050port.On the Action page, select Allow the connection and click Next.
On the Profile page, disable any connection type(s) that don’t apply to your Windows computer and click Next.
On the Name page, provide a Name (e.g.,
Odoo) and, optionally, a brief Description, then click Finish.
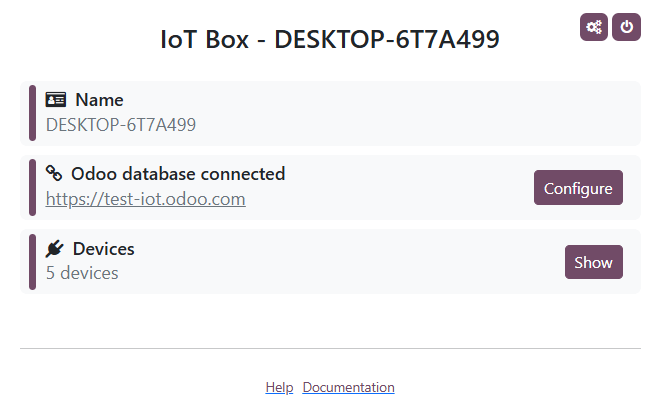
Windows virtual IoT homepage
To access the Windows virtual IoT’s homepage, navigate to the URL http://localhost:8069 on the
Windows virtual IoT computer or open a web browser from another computer on the same network as
the IoT system and navigate to the URL http://xxx:8069 (where xxx is the IoT system’s IP
address).
Once the Windows virtual IoT is connected to the Odoo database, its homepage can be accessed from Odoo by opening the IoT app and clicking the URL displayed on the IoT system’s card.
Ghi chú
Make sure the Windows Firewall is configured to allow access.
Device connection
Most devices automatically connect to the Windows computer used for the Windows Virtual IoT through Windows Plug and Play (PnP). However, if Windows does not recognize the device automatically upon connection, the administrator may need to manually install the appropriate drivers.
Mẹo
After connecting the devices to the computer, refresh the IoT system's homepage to verify that the device is listed. If the device does not appear, reload the handlers from the IoT system's homepage.
Windows virtual IoT restart
To manually restart the Windows IoT server, search the Windows start menu for services and
select the Services app. Scroll down to the odoo-server-xxx service (where
xxx is the odoo version), right-click it, and select Start or Restart.
Windows virtual IoT uninstall
To uninstall the Windows virtual IoT, uninstall the Odoo program on your Windows computer. Confirm the uninstallation and complete the steps in the Odoo Uninstall dialog.